Grow Thriving Cauliflower: Your Cool-Weather Planting Guide
Cauliflower, the denser, creamier cousin to broccoli, holds a formidable reputation among gardeners. Often perceived as a challenging crop to cultivate, this versatile brassica is, in fact, an incredibly rewarding addition to any home garden. From its tightly packed florets, perfect for roasting, steaming, or even as a grain alternative, to the exciting array of purple, orange, and chartreuse varieties often unavailable in stores, growing your own cauliflower unlocks a world of culinary and gardening satisfaction. While the phrase "how to grow summer cauliflower" might lead some to believe it's a heat-loving plant, the truth is that cauliflower truly thrives in cooler conditions. With the right timing and care, you can enjoy abundant harvests stretching from late spring through fall, perfectly timed for your "summer" culinary plans.
Understanding Cauliflower's Needs: A Cool-Weather Love Story
At its heart, cauliflower (
Brassica oleracea var. botrytis) is a cool-weather annual. It's grown for its distinct, edible flower heads, or "curds," which can weigh up to 1-2 pounds each. Unlike some vegetables that tolerate a wide range of temperatures, cauliflower is quite particular, having little tolerance for extreme heat, drought, or severe cold. Its sweet spot lies in the moist, temperate conditions of spring and fall.
The common perception of difficulty stems from this pickiness. Cauliflower demands consistent moisture, fertile soil, and ongoing attention to ward off pests and diseases. However, armed with a few key strategies, gardeners of all skill levels can succeed. Beyond the classic white heads, specialty varieties like 'Purple Graffiti', 'Cheddar' (orange), and 'Romanesco' (chartreuse, with its striking fractal pattern) offer a visual feast and unique flavor profiles that are rarely found on grocery shelves. And don't forget the bonus! Many varieties, once the main head is harvested, produce delicious secondary shoots, often called "sprouting cauliflower," extending your harvest.
Site Selection & Soil Preparation: Laying the Foundation for Success
The journey to a successful cauliflower harvest begins with choosing the perfect spot and preparing the soil meticulously. These initial steps are crucial for mitigating some of the crop's perceived challenges.
Full Sun is a Must
Cauliflower is a sun worshipper, requiring a minimum of 6 to 8 hours of direct sunlight daily to produce robust, full heads. Choose a location in your garden that receives ample, unobstructed sun throughout the day. Anything less will result in stunted growth and smaller, less dense curds.
Rich, Organically Enriched, Well-Drained Soil
This is arguably the most critical factor for cauliflower success. Cauliflower is a heavy feeder and thrives in soil that is deeply enriched with organic matter. Before planting, incorporate a generous 2-inch layer of high-quality compost or well-rotted manure into the top 6-8 inches of soil. This isn't just about nutrients; compost improves soil structure, enhances drainage, and boosts moisture retention – all vital for cauliflower's shallow root system. A soil pH between 6.0 and 7.0 (slightly acidic to neutral) is ideal for optimal nutrient uptake. If you're unsure about your soil's pH, a simple soil test can provide valuable insights.
Timing is Everything: Planting for Your "Summer" Cauliflower Harvest
To truly master
how to grow summer cauliflower, we must clarify that this refers to timing your planting for harvests *around* the summer months, rather than planting *in* the peak heat of summer. Cauliflower bolts (goes to seed) and produces bitter, loose heads in high temperatures.
For Early Summer Harvests (Spring Planting)
To enjoy your cauliflower heads as temperatures begin to warm in early summer, start your seeds indoors 6 to 8 weeks before your area's average last spring frost date. Cauliflower seedlings are sensitive to frost, so direct sowing outdoors in early spring is generally not recommended. Once all danger of frost has passed and the soil has warmed slightly, harden off your seedlings over 7-10 days by gradually exposing them to outdoor conditions. Transplant them into your prepared garden beds about 18 inches apart, in rows spaced 2-3 feet apart. This generous spacing ensures good air circulation, reduces competition for nutrients, and allows room for the large leaves to develop and protect the growing curds.
For Late Summer/Fall Harvests (Late Summer Planting)
This timing often yields the most successful and flavorful cauliflower, as the plants mature during the cooler, dwindling days of autumn. For a fall crop, sow seeds indoors around July 1st. These seedlings can then be transplanted outdoors in mid-August, or approximately 90 days before your area's first anticipated fall frost date. This schedule allows the plants to establish themselves during the relatively warm late summer and then develop their heads as temperatures cool down, providing the ideal conditions for dense, sweet curds.
Ongoing Care for Robust Heads
Cauliflower’s demanding nature often boils down to consistent care. Neglect in any of these areas can quickly lead to disappointment. For a deeper dive into optimal growing conditions, be sure to check out our related article:
Cauliflower Care: Essential Steps for Rich Soil & Full Sun Success.
Consistent Watering is Non-Negotiable
Cauliflower needs consistently moist soil, receiving 1 to 2 inches of water per week, either from rainfall or irrigation. Drought stress is a major cause of buttoning (premature formation of tiny heads) or bitterness. Water deeply and regularly, especially during dry spells. When watering, aim for the base of the plant and avoid splashing water onto the leaves, which can encourage fungal diseases.
Mulching for Moisture and More
Applying a 2-4 inch layer of organic mulch, such as straw, shredded leaves, or wood chips, around your cauliflower plants is highly beneficial. Mulch helps retain consistent soil moisture, suppresses weed growth (reducing competition for nutrients), and keeps the shallow roots cool, which is especially important as spring transitions into warmer weather.
Fertilization for Heavy Feeders
Beyond initial compost, cauliflower benefits from supplemental feeding. About 3-4 weeks after transplanting, and again when the heads begin to form, side-dress your plants with more compost or apply a balanced organic fertilizer. Look for formulations slightly higher in nitrogen during early growth, transitioning to something more balanced as heads develop.
Pest and Disease Management
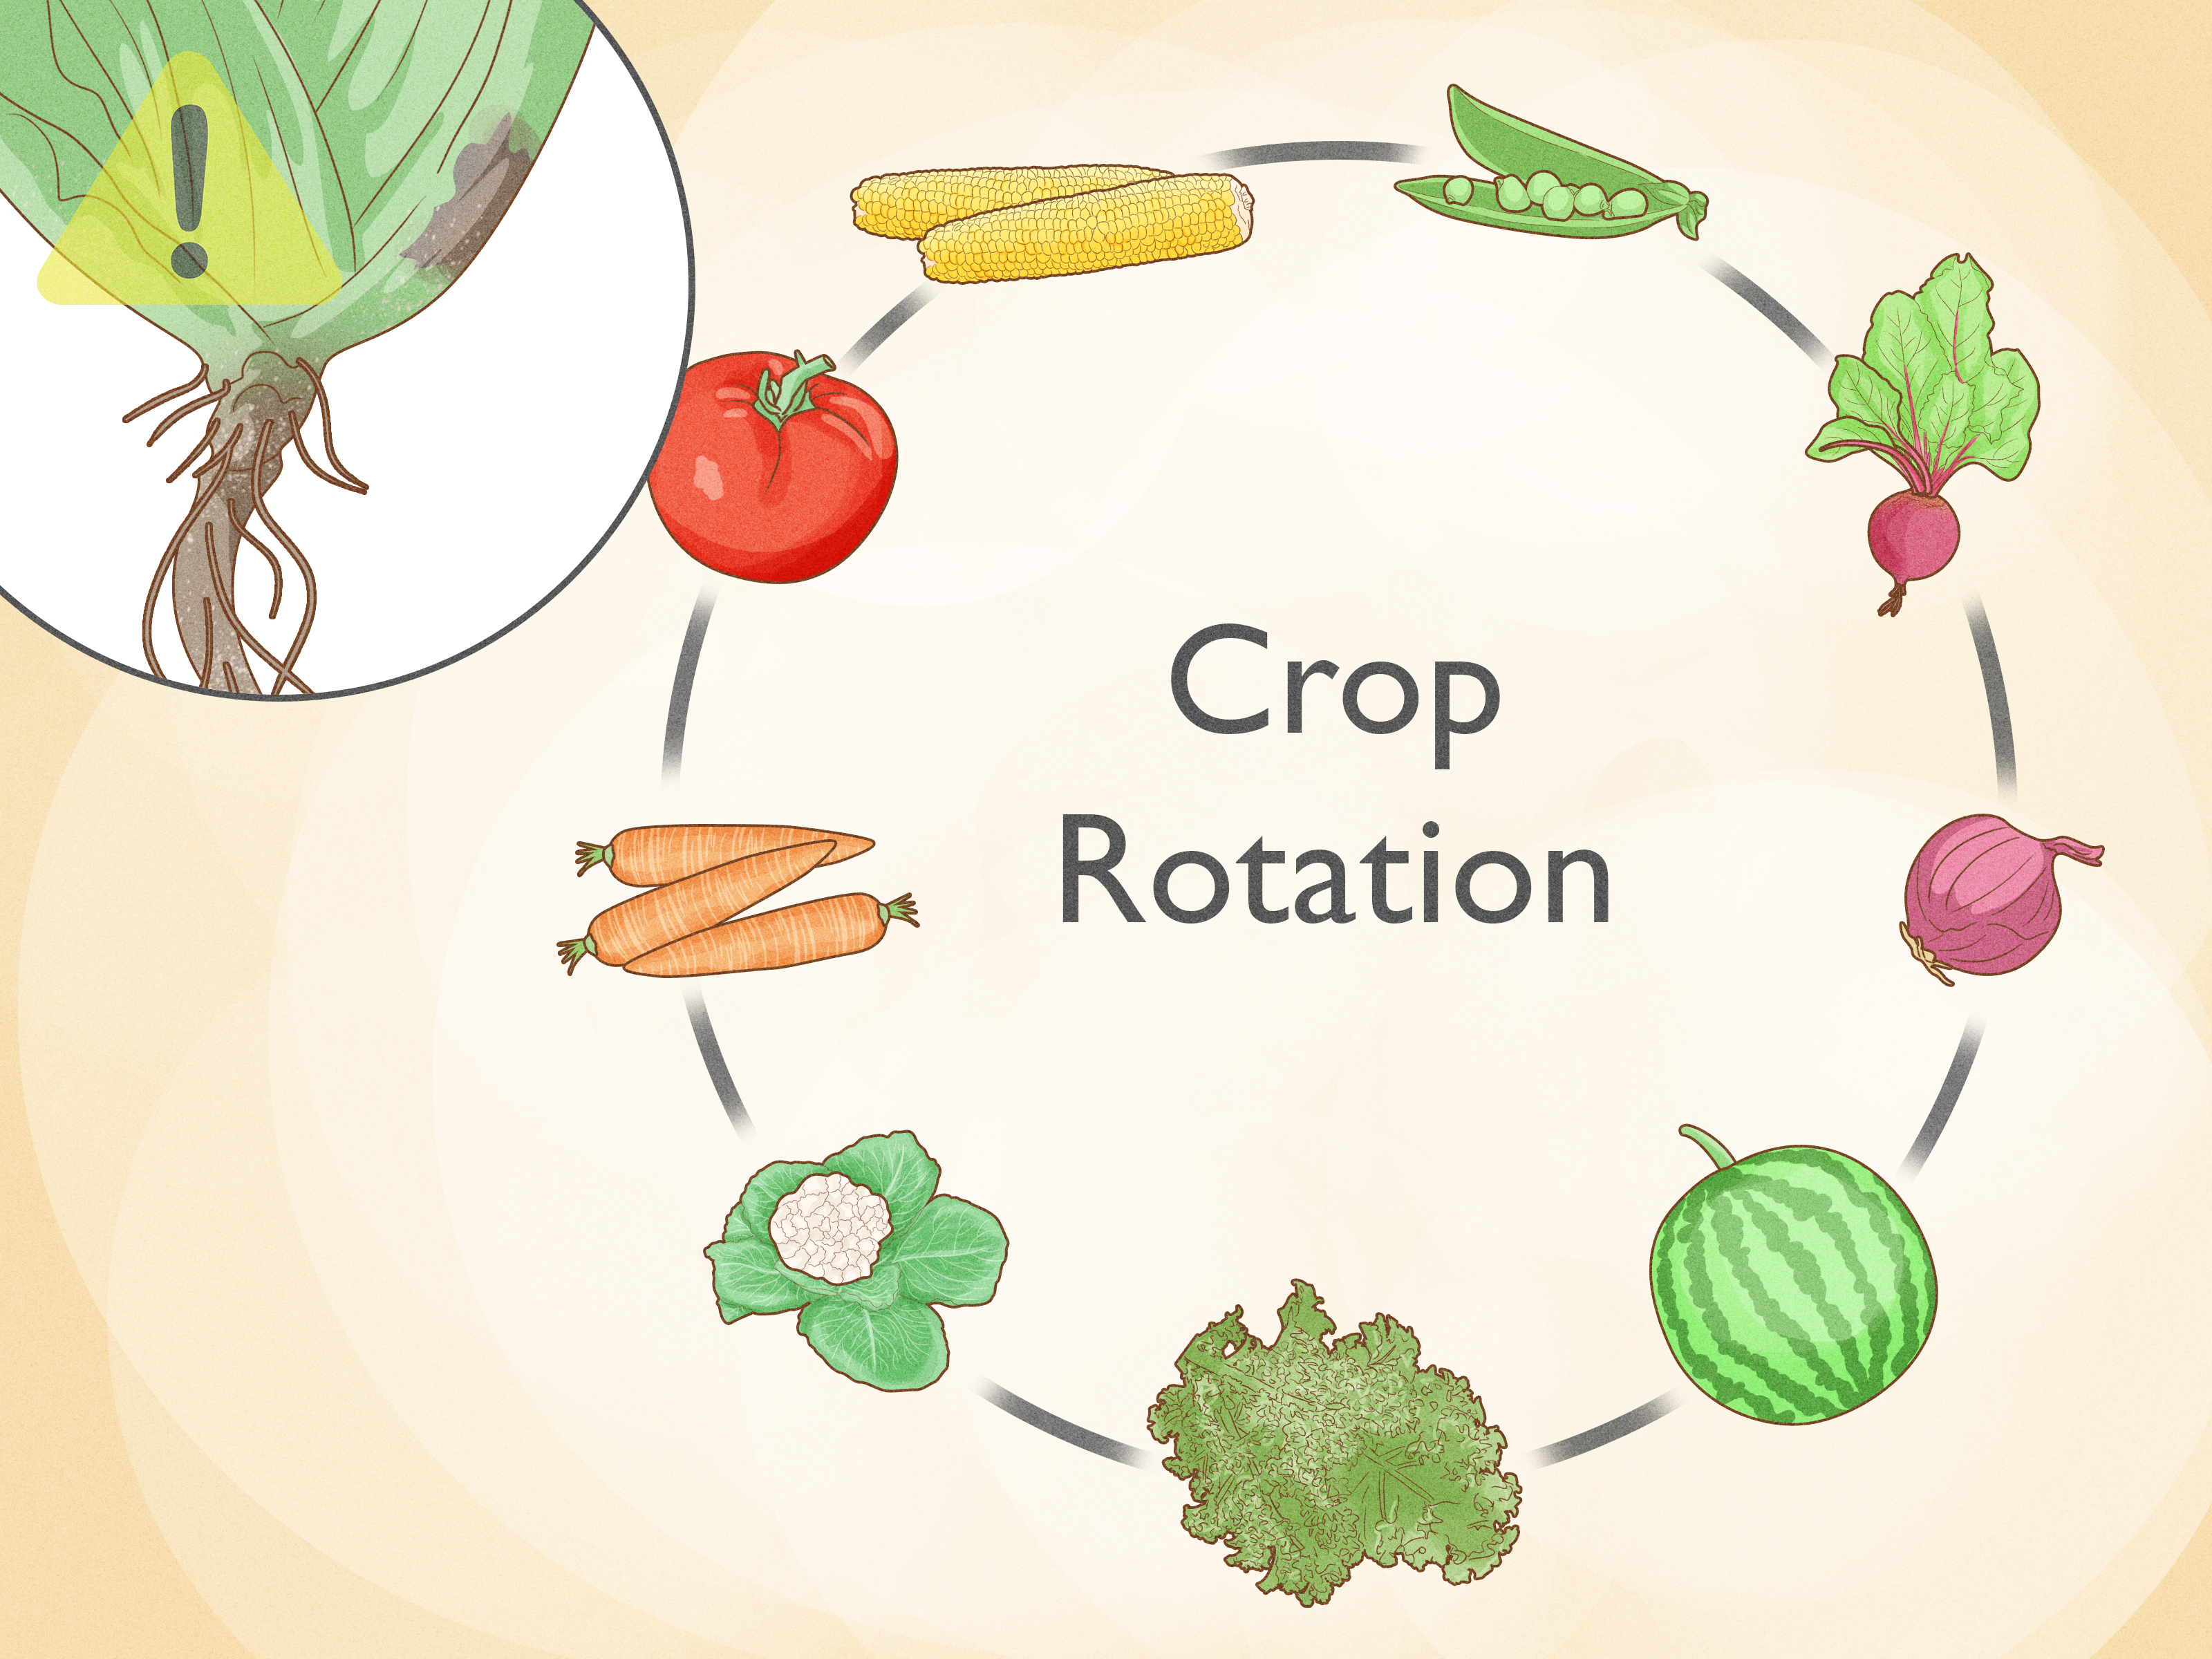
Cauliflower is susceptible to common brassica pests like cabbage worms, cabbage loopers, and aphids. Regularly inspect your plants for signs of infestation. Organic solutions include hand-picking caterpillars, using floating row covers to deter moths, and applying neem oil or insecticidal soap for aphids. Diseases like clubroot or black rot can be prevented with good crop rotation, ensuring proper soil drainage, and maintaining garden hygiene.
Blanching for Pristine White Heads
For traditional white cauliflower varieties, blanching is often recommended. This process involves tying the outer leaves of the plant loosely over the developing head once it reaches the size of a chicken egg. This protects the curd from direct sunlight, preventing it from turning yellow or brownish and developing a stronger flavor. Many modern white varieties are "self-blanching," meaning their inner leaves naturally curl to cover the head, or they simply don't require blanching. Colored varieties (purple, orange, green) do not need to be blanched as sun exposure enhances their vibrant hues.
Harvesting Your Prize: Beyond the White Curd
Knowing when and how to harvest your cauliflower is the final step to enjoying your homegrown bounty. For an in-depth guide on maximizing your yield, consult our article:
Mastering Cauliflower: Tips for Abundant Spring & Fall Harvests.
Harvest cauliflower when the head is firm, tight, and dense, typically 6-8 inches in diameter. Don't wait too long, or the florets will begin to separate, creating a "ricey" appearance, and the flavor can diminish. To harvest, use a sharp knife to cut the stem just below the head, leaving a few protective wrapper leaves attached. These leaves help protect the head during storage. Many varieties will produce smaller, secondary "sprouting cauliflower" shoots from the plant's base after the main head is removed, extending your harvest even further. Store fresh cauliflower in the refrigerator, where it will last for 1-2 weeks.
Conclusion
While cauliflower may have a reputation for being a bit of a diva, the rewards of growing your own are immense. By understanding its preferences for cool weather, rich soil, and consistent care, you can transform your garden into a prolific source of this versatile vegetable. Imagine the satisfaction of harvesting vibrant purple, zesty orange, or classic white heads, knowing they are fresh, organic, and bursting with flavor unmatched by anything from the store. With proper planning for planting times that align with cauliflower's love for cooler temperatures, you can absolutely master
how to grow summer cauliflower, ensuring a delicious supply for all your culinary adventures. Happy growing!